Step One. Slide the roll of cloth to be cut onto uncut cloth spindle so it will unroll toward the front side. This spool has 1/4 inch grooves cut into all four sides. If the spool of cloth does not fit snug, the spacers provided with the machine must be slid into these groves to make the spool fit snug. Do not make the spool so tight that you can not move it from side to side.
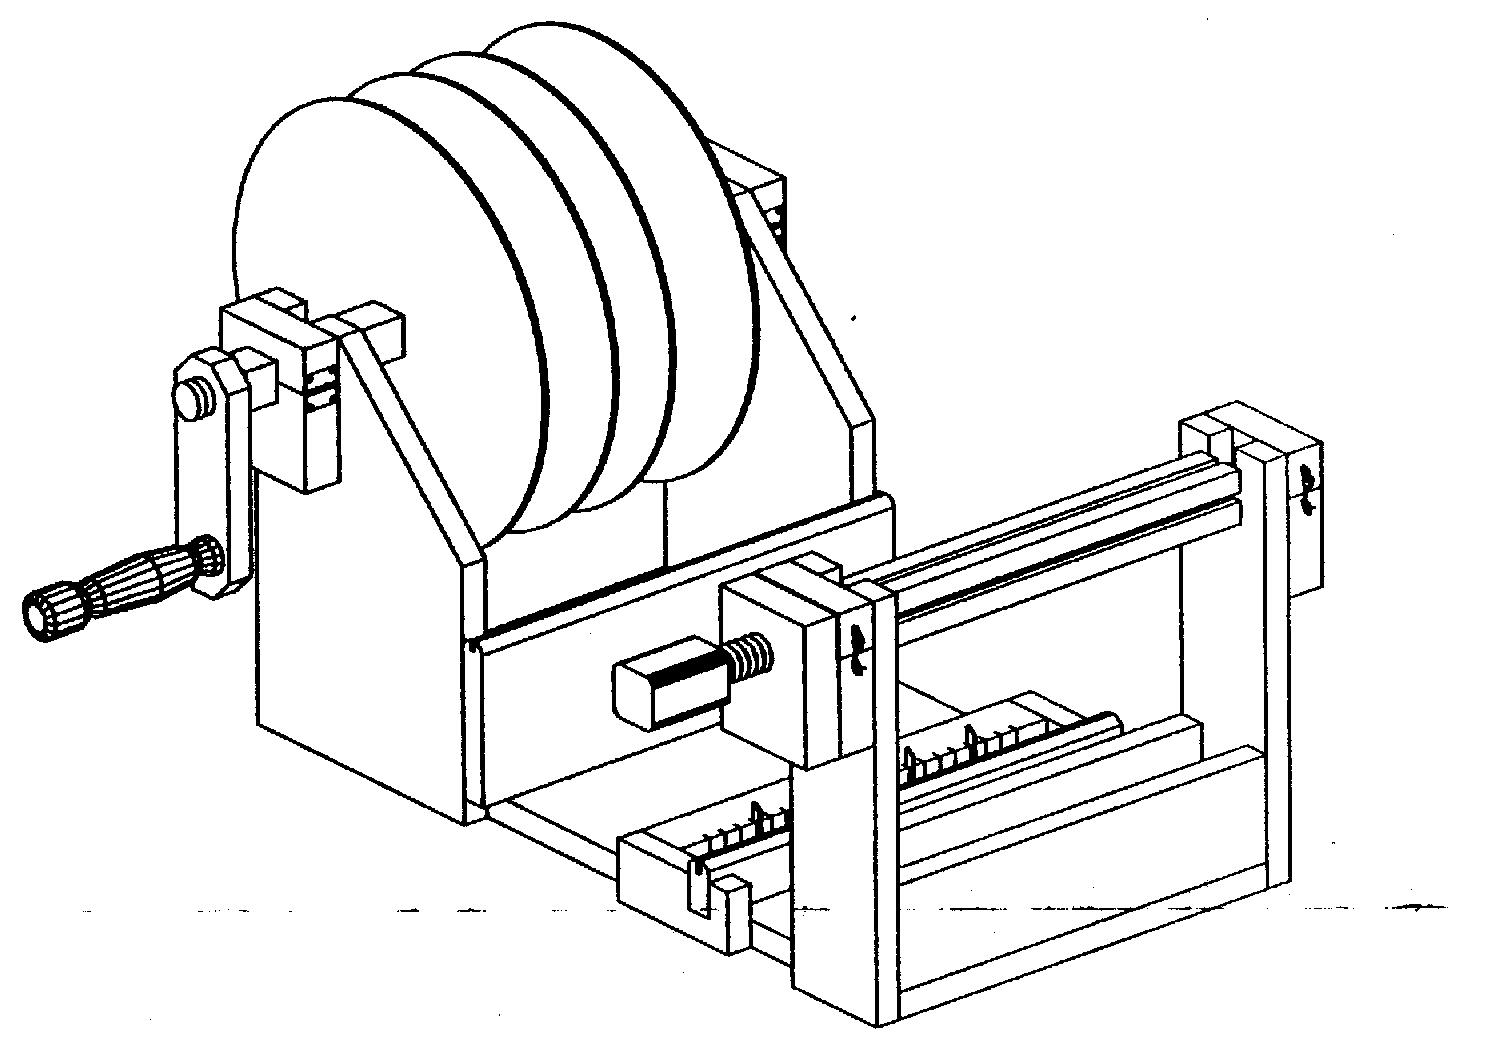
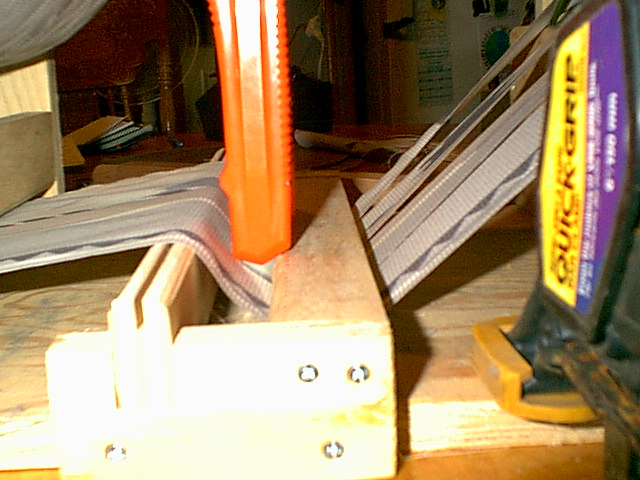
Step Two. Pull cloth from underneath the roll under the wrinkle guard. (See Figure 1 Below)
Step Three. Remove Set up bar. It lifts right out of the holder. (See Figure 1 Below)
Step Four. Slide cloth under cutter bar, about six inches. (See Figure 1 Below)
Step Five. Close the block and latch hooks. (See Figure 1 Below)
Step Six. Tighten friction brake so the cloth spool will not roll freely. (See Figure 1 Below)
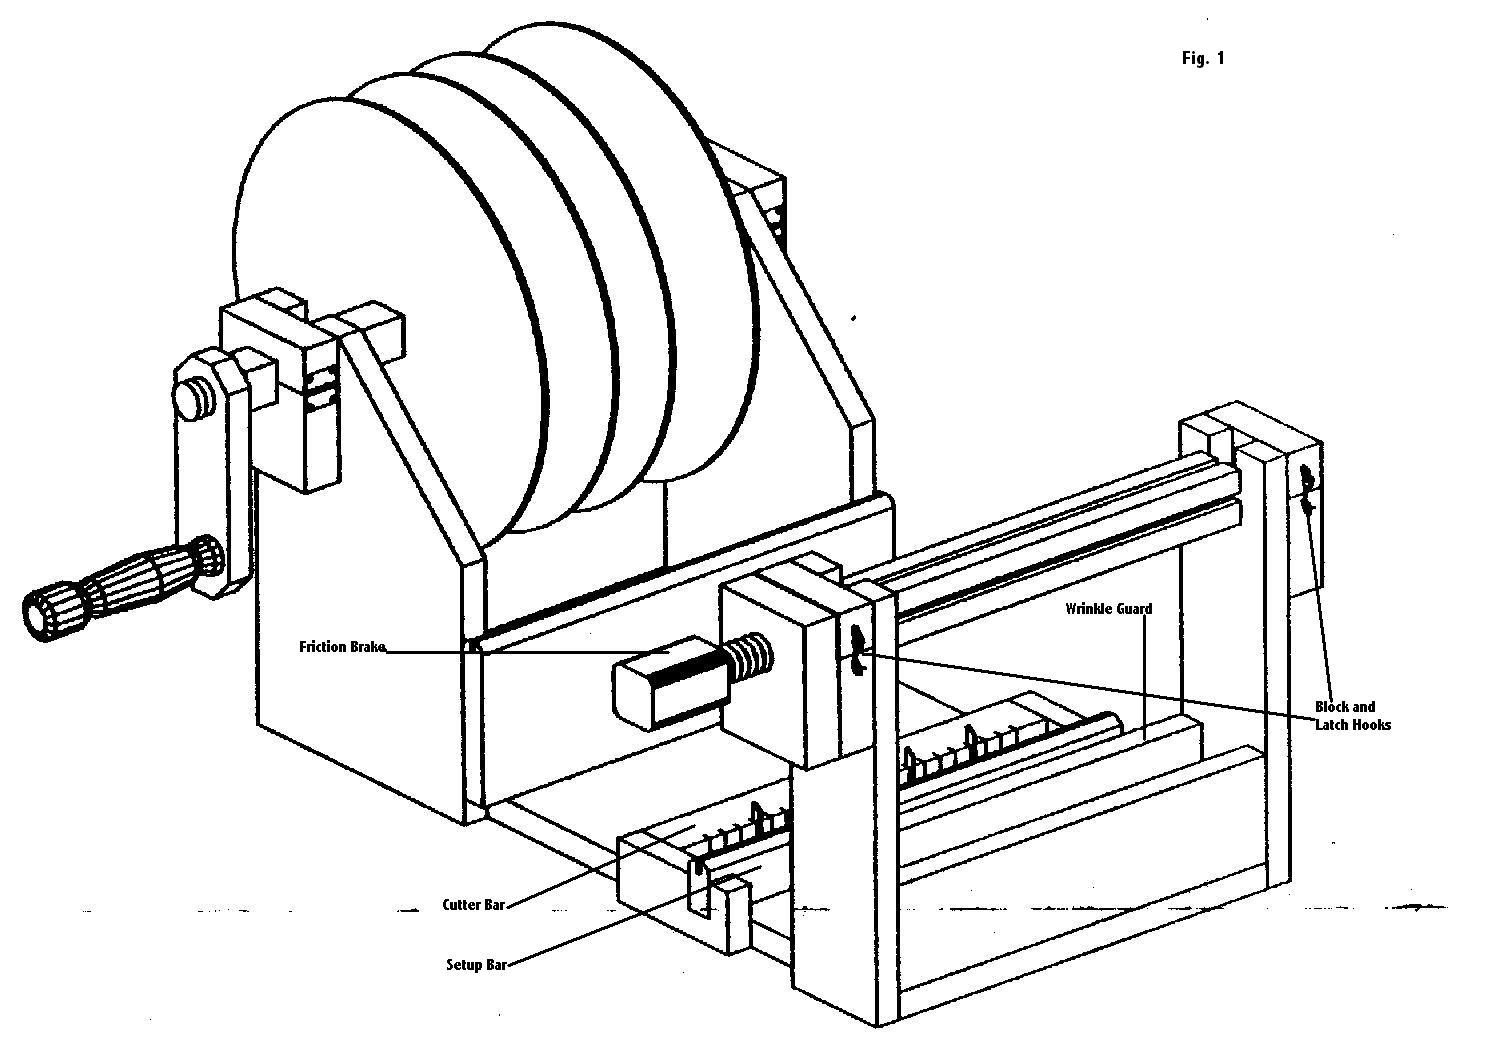
(Click on Picture for an enlarged view)
Step Seven. Replace set up bar under cloth.
Step Eight. Determine the width of cloth desired.
Step Nine. With one hand, hold the end of the cloth past the cutter bar. With the other hand put the knives in place at desired widths. Use standard utility knives with break off blades. Place the knife in front in front of one of the slits in the cutter bar at the width you want to cut the cloth. Push the knife through the cloth into the plywood bottom. Pull the knife handle towards the cutter bar until the back of the blade is in the slit in the cutter bar. Use as many knives as necessary to cut the whole width of the cloth to desired width.
Step Ten. The Machine should be clamped or fastened to a worktable..
Step Eleven. Make sure the spool of cloth is lined up square with the blades. You can slide the spool one way or the other.
Step Twelve. Standing at the back of the machine with both hands pull on the end of the cloth, pulling it through the knives cutting the cloth into strips. Pull about two feet in this direction.
Step Thirteen. You will need a separator disk for each knife. Put them on the crank in the wear blocks, on the back of the machine.
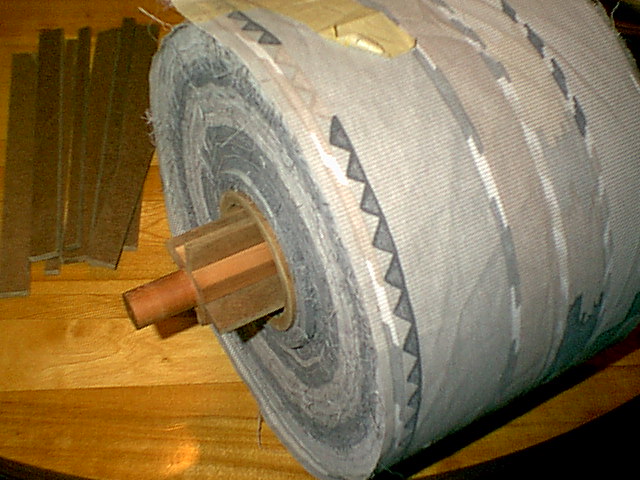
Step Fourteen. Cut off six inches of cloth that is holding the strips together, so you will have individual pieces.
Step Fifteen. Line up the separator disks with the knives. Put the Crank arm, and the Handle on the crank.. Start with one of the middle strips of the cloth. Bring it under the crank in between the separator disks. Use Masking tape to tape the end to the crank. Do all strips of cloth this way keeping the disks lined up with the knives. Make sure to keep the same tension on all of the strips.
Step Sixteen. Close the wear blocks and latch them. Make sure the friction brake is just tight enough to keep the roll of cloth from spinning free. Start cranking slowly at first, to see if any adjustments must be made.
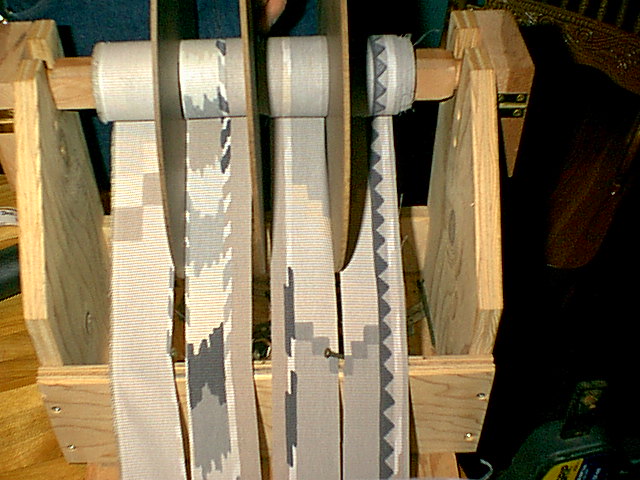
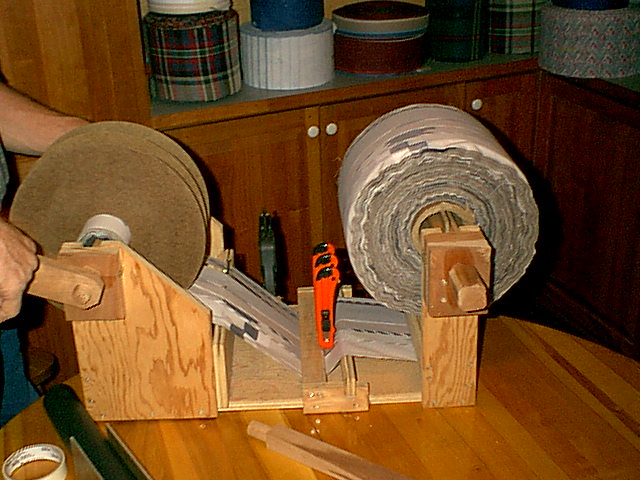
The Machine should look Something like these pictures when the setup is complete.
U.S. Patent Number: Des. 426,244